
The Roof Insurance Claim Process in Connecticut, Step by Step
A branch comes down in the night. The next morning there's a damp ring on the bedroom ceiling and a strip of shingles in the yard. Most Connecticut homeowners have never filed a roof claim before, and the first question is usually the same: what happens now?
The honest answer is that every carrier runs its process a little differently, and your own policy terms control what's covered. Still, nearly every roof insurance claim process follows the same basic sequence: protect the home, document the damage, contact the carrier, get the roof inspected, meet the adjuster, compare the estimate against the repair scope, complete the work, and keep the records. The eight steps below walk through each decision point so nothing catches you off guard.
Not sure what your roof looks like up close?
Schedule a Complimentary Roof InspectionStep 1: Protect the home from additional damage
Your first job isn't paperwork. It's stopping the problem from getting worse. Move furniture and electronics away from active leaks, set out buckets, and if water is coming through a ceiling, a small drainage hole in the bubble can prevent a larger collapse.
Reasonable temporary protection matters to your claim, too. Most policies expect homeowners to take sensible steps to limit further damage after a storm. That means things like tarping done safely from a ladder or by a professional, not permanent repairs, and never climbing onto a wet, icy, or visibly unstable roof. If you hire someone for emergency tarping or buy supplies, keep every receipt and photograph the temporary protection in place. Those costs are often part of the claim file.
Keep the line clear in your head: temporary mitigation now, permanent repair later, after the scope is settled.
Step 2: Document what you can see
Documentation is the backbone of the entire claim. Before anything gets cleaned up or repaired, record:
- The date and time of the storm or the moment you discovered the damage
- Exterior signs: missing or lifted shingles, dented gutters, debris on the roof, damaged flashing
- Interior signs: ceiling stains, wet insulation, drips in the attic, affected rooms
- Photos and short videos taken from the ground, from windows, or from other safe vantage points
- Notes about anything you threw away or moved, with photos taken first
Photograph more than feels necessary. Wide shots establish context, close shots show detail. What you shouldn't do is try to diagnose the cause or decide what's covered. That's not your job at this stage, and guessing in writing can create confusion later. Record what you see, not what you conclude.
Step 3: Review the policy and contact the carrier
Pull out your policy documents, or log into your carrier's portal, before you call. You're looking for your deductible amount, any wind or hail exclusions or separate deductibles, filing deadlines, and how the policy handles depreciation. Some policies pay replacement cost; others pay actual cash value, which subtracts depreciation from the payout. These terms vary widely between carriers and between policies from the same carrier.
When you call, the carrier opens a claim, assigns a claim number, and explains its next steps. Write the claim number down and save it with your photos. For any question about what your policy covers, the answer has to come from your carrier and your policy documents. A roofing contractor can tell you what's physically wrong with the roof. Only the insurer can tell you what it will pay for.
Step 4: Schedule a professional roof inspection
While the claim is being set up, get a roofer on the roof. A professional inspection documents the physical condition of the roofing system: storm-related damage, the age and state of the shingles, flashing and ventilation issues, photos from on the roof itself, measurements, and a recommended repair or replacement scope.
That documentation does two things. It gives you an independent record of the roof's condition close to the date of loss, and it gives the adjuster something concrete to compare against. To be clear about the division of labor: the contractor documents physical conditions, and the insurer determines coverage. Those are different jobs, and a trustworthy roofer won't blur them.
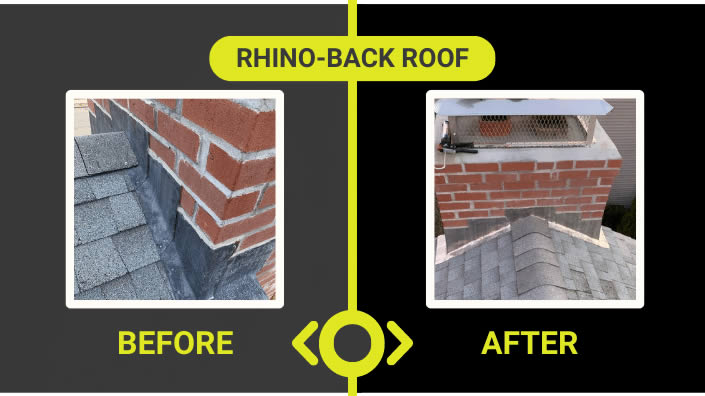
Rhino-Back Roofing performs this kind of documentation regularly as part of insurance restoration roof work across Connecticut, with photo reports homeowners can hand directly to their carrier.
Step 5: Meet the insurance adjuster
The carrier sends an adjuster to inspect the damage in person or, in some cases, reviews photo documentation remotely. The adjuster's role is to assess the damage on behalf of the insurer and prepare the carrier's estimate of covered repairs.
Keep a simple claim folder, digital or paper, with the claim number, the adjuster's name and contact information, the inspection date, and your notes from the visit. Many homeowners ask their roofing contractor to be present for the adjuster meeting so the two can look at the same conditions together. That can make the conversation more concrete, though it doesn't guarantee any particular outcome. See what to expect during insurance and inspection for how Rhino-Back handles that visit.
Step 6: Review the carrier's estimate and the contractor's scope
After the adjuster's visit, the carrier issues an estimate of what it will pay, minus your deductible. Set it side by side with your contractor's scope of work. The two documents often use different line items, different quantities, or different assumptions, and that's normal. One might include drip edge, underlayment, or code-required items the other doesn't. One might measure the roof slightly differently.
Where the documents disagree, ask questions. Which items were omitted, and why? Is a line item missing because it's excluded, or because it was overlooked? Carriers have supplement processes for exactly this situation, where the contractor submits documentation for work the initial estimate didn't capture. Approach it as a reconciliation of paperwork, not a battle. If the carrier ultimately declines the claim, there's a separate path for that, covered in Rhino-Back's guide on what to do after a denied roof insurance claim.
Step 7: Approve the work and complete repairs
Once the scope is settled and you've chosen your contractor, get everything in writing before work begins: the full scope of work, the materials and shingle line being installed, the schedule, permit responsibilities where applicable, payment milestones, and how any change orders will be documented and priced if hidden damage turns up during tear-off.
Timing varies with carrier approvals, material availability, weather windows, and the complexity of the roof. A straightforward replacement moves quickly once approvals and materials are in hand. A project with supplements, special-order materials, or winter weather takes longer. A good contractor will give you a realistic window rather than a promise.
Step 8: Keep the closeout records
When the work is done, the claim isn't closed until the paperwork is. Save all of it in one place:
- The final invoice showing the completed scope
- Before, during, and after photos
- Warranty documents for materials and workmanship
- All carrier correspondence, including the estimate and any supplements
- Proof of payment, including the deductible
- Any completion certificate or paperwork the carrier requests to release final funds
These records matter when you sell the house, if a warranty question comes up years later, or if the carrier requires documentation to release recoverable depreciation.
Common mistakes during a roof insurance claim
A few missteps come up again and again in Connecticut claims:
None of these mistakes is fatal to a claim, but each one makes the process slower and harder than it needs to be.
Connecticut roof insurance claim timeline
Homeowners usually want a number of days. The truthful answer is a sequence, not a number:
Each stage has its own clock. Carrier response times, adjuster availability after a widespread storm, Connecticut weather, material lead times, and any disagreement over scope all stretch or compress the timeline. A clean claim after an isolated event moves much faster than a claim filed the same week a nor'easter hit half the state and every adjuster's calendar filled up. Focus on completing your own steps promptly and keeping your documentation tight. That's the part of the timeline you control.
Frequently asked questions
Should I call my insurance company or a Connecticut roofer first?
There's no single required order, and policies and situations vary. Many homeowners get a roof inspection first so they know what they're reporting, while others open the claim right away, especially when interior damage is active. Rhino-Back covers the tradeoffs in detail in should I call insurance or a roofer first.
What should I photograph after roof damage in Connecticut?
From safe positions only: the roof from the ground on all sides, close shots of visible shingle or flashing damage, gutters and downspouts, debris in the yard, and every interior sign such as ceiling stains or attic drips. Include a date reference, and photograph any receipts or damaged materials before discarding anything.
Does a roofer decide whether roof damage is covered?
No. A roofer documents the physical condition of the roof and recommends a repair or replacement scope. Coverage decisions belong to your insurance carrier and are governed by your policy terms, which vary from policy to policy.
What happens if the insurance estimate and roofing scope differ?
Differences are common and usually come down to line items, quantities, or measurements. Ask both sides about anything omitted or unclear. Carriers have a supplement process that allows the contractor to submit documentation for work the initial estimate missed. The carrier then decides what the policy covers.
Can temporary roof protection affect a claim?
Yes, in the sense that most policies expect reasonable steps to prevent further damage after a loss. Safe, documented temporary protection such as tarping, with photos and receipts saved, supports the claim file. Skipping mitigation entirely can complicate a claim if damage worsens. How a specific carrier treats these costs varies by policy.
How long does a roof insurance claim take in Connecticut?
It depends on carrier response times, adjuster availability, weather, material lead times, and whether the estimate and scope need reconciliation. Claims after isolated events generally move faster than claims filed after a major storm affecting many Connecticut homes at once. No contractor can promise a specific timeline, because several stages sit with the carrier.
Where the roof insurance claim process ends
The roof insurance claim process runs from the first tarp to the last saved document: protect the home, record the damage, work through the carrier's steps, reconcile the paperwork, and close it out with a complete file. Homeowners who document early and ask questions at the scope stage tend to have the smoothest experience, in Connecticut or anywhere else.
Storm Damage on Your Connecticut Roof?
If your Connecticut home may have storm-related roof damage, call Rhino-Back Roofing at (860) 217-1424 or request an estimate below.
Request an EstimateCoverage and claim decisions remain with the homeowner's insurer and policy.